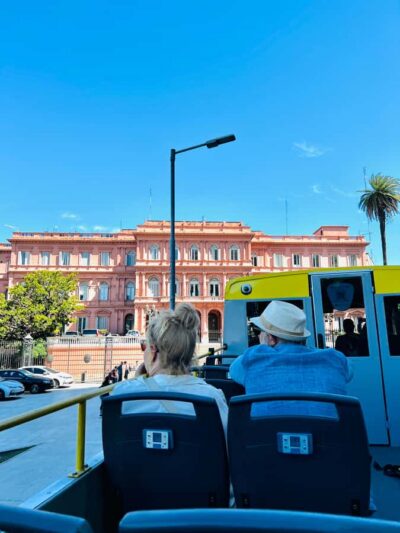
First-timers get their bearings fast. The Auckland Explorer Hop-on Hop-off tour is an easy way to see Auckland’s key sights with English audio and a flexible 1- or 2-day ticket, plus a loop that’s about an hour if you stay on the bus.
I love how it hits big-name spots without extra planning: Sky Tower, Auckland Museum, Parnell Village, and Kelly Tarlton’s SEA LIFE Aquarium. I also like the onboard comfort, including air-conditioned buses and WiFi, and the fact that the commentary comes through the bus speakers.
The main consideration is timing. On busy cruise-ship days, crowds and longer wait times can happen even with extra coaches, and a few trips have reported minor issues with audio or onboard equipment.
In This Review
- Key things to know before you ride
- Picking the right Auckland Explorer pass: 1 day vs 2 days
- Where you board at Downtown Auckland and how the route shifts
- Sky Tower and SkyCity: start with the view
- Auckland Art Gallery and Newmarket: culture and shopping without overplanning
- Auckland Museum, Holy Trinity Cathedral, and Parnell Village
- Bastion Point Lookout and Kelly Tarlton’s SEA LIFE: scenery plus penguins
- War Memorial Museum, Domain Wintergardens, and the “central hills” feel
- MOTAT: when you want something different than the usual sights
- Comfort and onboard details: open-top views, WiFi, and audio through speakers
- Getting value from $43.44: when this hop-on bus pays off
- Who this tour fits best (and who should think twice)
- Should you book the Auckland Explorer Hop-on Hop-off?
- FAQ
- Where is the main departure point for the Auckland Explorer?
- What time does the tour start?
- How long does the bus loop take?
- Is there English commentary on board?
- Is the ticket valid for 1 day or 2 days?
- Can I hop off at Sky Tower, Auckland Museum, and Parnell Village?
- Are the buses air-conditioned and is WiFi included?
- Is food and drink included in the ticket?
- What if it’s a bad weather day or my plans change?
Key things to know before you ride
- Flexible pass (1 or 2 days): build your own Auckland route instead of rushing one fixed itinerary
- Major landmarks on the stops: Sky Tower, Auckland Museum, Parnell Village, SEA LIFE Kelly Tarlton’s, Mount Eden, MOTAT
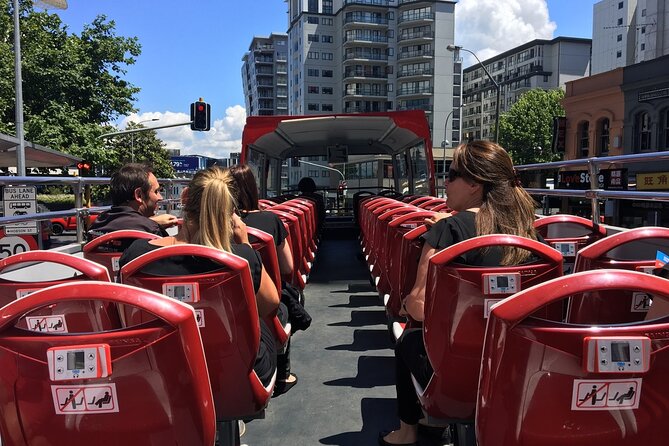
- Onboard practicality: air-conditioning and WiFi, plus English commentary through the bus speakers
- Two routes can tangle at the museum: staying on can accidentally turn a one-hour loop into a longer ride
- Cruise-ship days can slow you down: even with extra buses, you may wait at stops
- A hilly city mindset helps: you’ll want to plan viewpoints and stairs with your energy in mind
Picking the right Auckland Explorer pass: 1 day vs 2 days

The headline value here is choice. Your ticket lets you create your own sightseeing plan, and it’s valid for one or two days—so you can do the essentials today and return tomorrow for anything you missed. If you’re in Auckland for a short visit, that flexibility matters more than squeezing in every stop just because the bus is there.
If you only have one day, I’d aim for the “big hitters” on the routes: skyline at Sky Tower, a museum stop (Auckland Museum or the War Memorial Museum), and at least one scenic viewpoint like Bastion Point or Mount Eden. One-day use works best when you’re disciplined about time and you know what you want to prioritize before you step off.
If you can do two days, the tour becomes a low-stress way to spread things out. You can hop off once for a longer museum visit, grab a neighborhood walk in Parnell, and still get to a couple of outer stops (like Zoo-adjacent areas or MOTAT) without feeling like you’re sprinting between buses.
Where you board at Downtown Auckland and how the route shifts
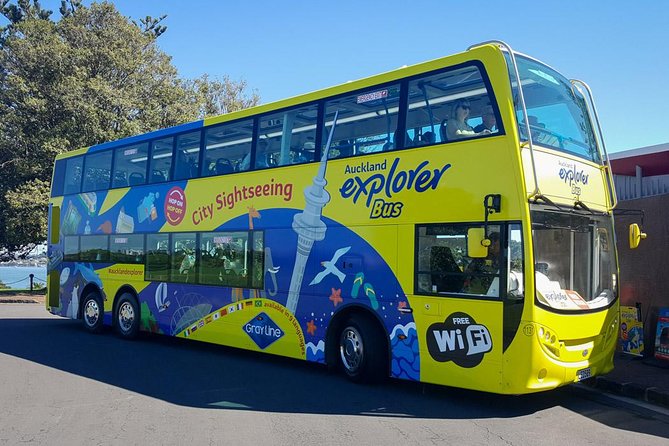
You start at Downtown Auckland. The main departure point is at Stop 1: Customs Street East. Buses begin at 9:00 am, and they run regularly throughout the day on a seasonal schedule. In plain terms: it’s designed for a full morning-to-afternoon sightseeing window, not a late-night party bus.
One practical catch: you may need to exchange your voucher at SkyCity Auckland / the Sky Tower area. If you’re relying on quick instructions, I recommend checking where your redemption point is before you show up—because it’s easy to end up asking multiple people when you’re time-crunched.
Also, pay attention when the bus transitions around the museum zone. There are two routes that connect/intersect near Auckland Museum, and the bus can switch you onto a different circuit. Sometimes that’s a happy accident (you see more), and sometimes it’s confusing (you think you’re doing only the shorter loop). Either way, it helps to treat the tour as a sightseeing tool, not a stopwatch.
Sky Tower and SkyCity: start with the view

Stop 2 is SkyCity Auckland, at the Sky Tower corner of Victoria and Federal Streets in the CBD. This is the easiest place to “get the map in your head.” You can do a quick skyline reset here before you move into museums, neighborhoods, and viewpoints.
Why it’s worth starting here: Auckland can look surprisingly spread out from street level. A first stop at Sky Tower helps you understand what’s downtown, what’s waterfront-adjacent, and where hills start to take over the city’s shape.
What to do when you hop off:
- If you want one iconic viewpoint, this is your best bet.
- If you don’t want to go up, even a short walk around the Sky Tower area helps you orient yourself.
If the voucher exchange adds a few minutes, it’s still usually time well spent because it prevents a bigger time sink later.
Auckland Art Gallery and Newmarket: culture and shopping without overplanning
After the Sky Tower, the route includes Auckland Art Gallery (Stop 3). It’s a solid hop-off if you like art and want an indoor break from Auckland’s changing weather. The benefit with a hop-on pass is you don’t have to commit to a long museum day—just step off, see what you feel like seeing, and get back on later.
Then you reach Westfield Newmarket at 359 Broadway (Stop 4). Newmarket is the kind of place that turns a bus tour into an actual day you’ll remember: browsing, snacks, and a neighborhood feel that’s different from downtown.
Drawback to plan around: if you’re hoping for quick, picture-perfect strolls at every stop, some distances between sights can feel longer than expected in a hilly city. The bus helps, but it doesn’t magically eliminate walking.
Auckland Museum, Holy Trinity Cathedral, and Parnell Village

Stop 5 is Auckland Museum (outside the South Entrance). This is another strong anchor stop because it’s central to the route transition area, and it’s also a place you can genuinely lose time in if you like exhibits.
A smart strategy: if you’re trying to manage energy, keep your museum visit mid-day. That’s often when you want to be indoors and sheltered from sun or sudden wind.
Two stops that pair naturally are:
- Holy Trinity Cathedral (Stop 6, at the corner of St Stephens Ave & Parnell Rd)
- Parnell Village (Stop 7 at 279 Parnell Road)
Parnell Village is where the tour feels less like a drive-by checklist and more like a neighborhood walk. Holy Trinity Cathedral adds a historical-looking touchpoint without needing a full sightseeing day.
How I’d use this section:
- Hop off at the cathedral area for quick photos and a calm break.
- Continue on foot or use the next bus opportunity to reach Parnell Village and linger for food or browsing (food isn’t included on the tour, so plan your own meal).
Bastion Point Lookout and Kelly Tarlton’s SEA LIFE: scenery plus penguins

Stop 8 is Bastion Point Lookout on Hapimana Street. This is a viewpoint stop—meaning you’ll probably feel the difference immediately. Auckland gets greener and more dramatic the closer you get to vantage points like this.
Stop 9 is Sea Life Kelly Tarlton’s at 23 Tamaki Drive. This is the family-friendly highlight: you can meet King and Gentoo penguins at the aquarium. If your group includes kids, this stop can easily become the emotional high point of the day. Even without kids, the penguin factor and the aquarium setting make it a memorable indoor option.
Why these two stops work together: Bastion Point gives you outdoor skyline-and-water views, and Kelly Tarlton’s resets you back into a controlled, weather-proof attraction. That mix is a good way to avoid the trap of only doing either outdoors or indoors.
War Memorial Museum, Domain Wintergardens, and the “central hills” feel
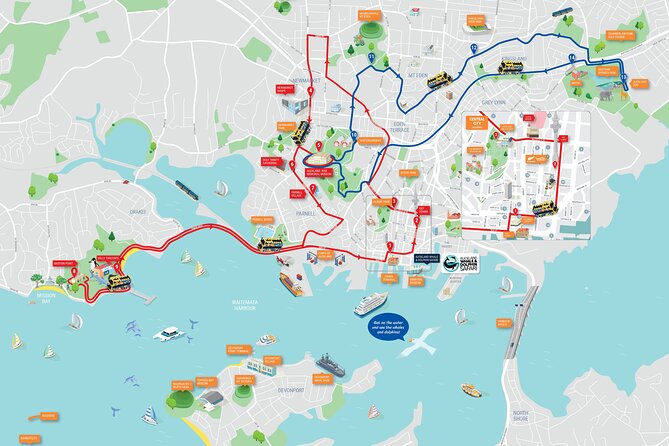
On the other side of the network, you’ll see stops tied to the Auckland Domain area.
First up is Auckland War Memorial Museum (Stop 1 on this set, outside the South Entrance). This stop is ideal if you want a cultural and educational break that’s still close to the city’s green spaces.
Next is Domain Wintergardens (Stop 2). It’s a greenhouse-style stop, which tends to feel like a pause button. If Auckland weather turns, this is the kind of stop that keeps your day moving.
Then you climb into the hill-country vibe:
- Mount Eden (Stop 3)
- Eden Park (Stop 4)
- Auckland Zoo (Stop 5)
A practical note from real-world experience: Mount Eden is the kind of stop where the view is worth it, but you need to plan for walking and stairs. The city is hilly, and hop-on hop-off tours are still “hop and walk” tours at viewpoints. If you’re short on mobility, I’d decide early how much hiking you want to do and then treat the bus ride as the scenic transport between effort levels.
MOTAT: when you want something different than the usual sights

Stop 6 in this latter cluster is MOTAT Museum of Transport and Technology. This is a smart pivot stop if you’ve already done museums and viewpoints and want a change of pace. It tends to appeal when you want interactive, hands-on energy rather than a quiet exhibit circuit.
This is also one of those stops that makes the whole tour feel more “Auckland-specific.” It adds a modern, local flavor that balances the classics like the Sky Tower and garden areas.
Comfort and onboard details: open-top views, WiFi, and audio through speakers
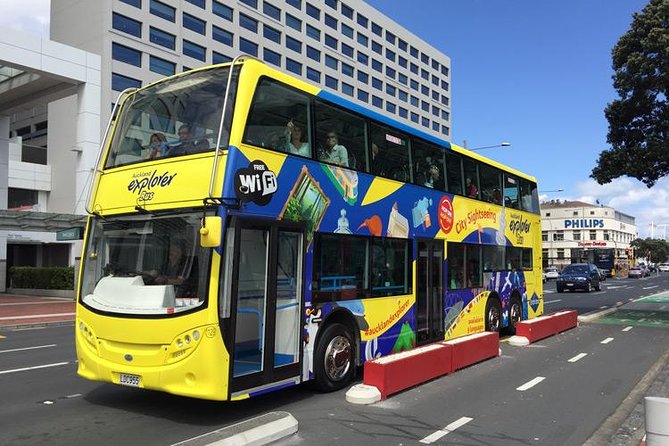
The buses are equipped with air-conditioned comfort, and there’s WiFi on board. That’s surprisingly helpful on a long port day when your phone battery and mapping app may become your main stress point. Having WiFi means you can check what time you want to meet up again with friends or review your next stop without burning your data.
You may also get an open-air top section on some buses, which makes a big difference for Auckland’s views. When the skies are decent, it’s a great way to see the city without the glass reflection you get from enclosed seating.
Audio delivery is another win: commentary is provided in English and comes through a speaker system on the bus, so you don’t necessarily need earphones to follow along. That said, a few people have reported occasional audio skipping or equipment quirks on specific buses. If that happens to you, tell the driver or staff right away so they can troubleshoot.
Getting value from $43.44: when this hop-on bus pays off
At $43.44 per person, this tour isn’t the cheapest way to see Auckland—but it can be excellent value if it replaces multiple short rides and saves you from figuring out transport between distant neighborhoods.
Here’s the value math that works in real life:
- You get a network of major stops in one ticket
- You avoid the mental load of transfers
- You can choose how much time to spend at each sight instead of following a rigid schedule
It may feel less worth it if you end up waiting a lot for buses or if you only manage to ride a couple of stops in your time window. Some experiences—especially on busy days—have included longer waits and crowding where people can’t board right away. If your schedule is tight (like a cruise port window), build in slack time for lines and boarding.
Who this tour fits best (and who should think twice)
This works best for:
- First-time visitors who want an efficient overview
- People who like choosing their own pace at stops
- Anyone who values onboard commentary while moving between neighborhoods
- Groups with mixed interests, since the route includes viewpoints, museums, and an aquarium
It might not be ideal if:
- You hate waiting around for buses (hop-on/off depends on headways and road conditions)
- You want a perfectly timed, no-communication sightseeing experience (route shifts at the museum area can add confusion)
- You’re trying to maximize every minute with zero buffer during peak crowds
Should you book the Auckland Explorer Hop-on Hop-off?
I’d book it if you want an easy, low-planning way to hit Auckland’s headline sights in a single day—or use the 2-day option to slow down and spread the attractions out. The combination of English audio, major stops like Sky Tower, Auckland Museum, Parnell Village, and Kelly Tarlton’s, plus the comfort features like WiFi and air-conditioning, makes it a practical choice.
I’d think twice if you’re traveling during peak congestion windows (like cruise-ship days) and your schedule is unforgiving. In that case, the tour can still help, but only if you plan for waits and build extra time between hops.
FAQ
Where is the main departure point for the Auckland Explorer?
The main departure point is at Stop 1: Customs Street East in Downtown Auckland.
What time does the tour start?
The start time listed is 9:00 am.
How long does the bus loop take?
The tour loop is described as taking about an hour to complete.
Is there English commentary on board?
Yes. The tour includes informative English commentary.
Is the ticket valid for 1 day or 2 days?
Your bus ticket is valid for one or two days, depending on the option you choose.
Can I hop off at Sky Tower, Auckland Museum, and Parnell Village?
Yes. Stops include SkyCity Auckland (Sky Tower), Auckland Museum, and Parnell Village.
Are the buses air-conditioned and is WiFi included?
Yes. You’ll get an air-conditioned vehicle and WiFi on board.
Is food and drink included in the ticket?
No. Food and drinks are not included.
What if it’s a bad weather day or my plans change?
The tour requires good weather. If it’s canceled due to poor weather, you’ll be offered a different date or a full refund. You can also cancel for free up to 24 hours in advance for a full refund.