Temple streets meet ocean views on one smooth day. This Kamakura & Enoshima bus tour is interesting because it stacks iconic stops with real downtime: I like the Great Buddha quick punch of awe and you get Enoshima’s coast views later, not just another city walk. The one catch is the day runs long (about 9.5 hours) and some of the best sights depend on weather, like a potential Mount Fuji silhouette.
I also really like how much the guide matters here. Guides such as Romy and Harry are praised for explaining shrine and temple manners, keeping the group moving smartly, and even working with weather when it gets hot. If you prefer a guided plan with enough structure to prevent navigation headaches, this style of tour should fit you well.
In This Review
- Key Highlights You’ll Actually Care About
- How This 9.5-Hour Bus Day Works From Tokyo and Yokohama
- Tsurugaoka Hachimangu Shrine: Kamakura’s Sacred Main Street
- Komachi Street Shopping Break: Snacks, Souvenirs, and Local Flavor
- Hasedera Temple’s Eleven-headed Kannon and Flower Views
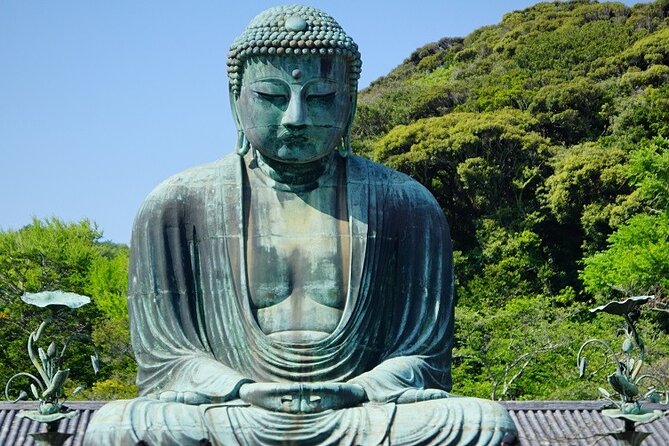
- Kotoku-in Great Buddha: The Short Stop That Hits Hard
- Enoshima Island Afternoon: Shrines, Gardens, and Coast Panoramas
- Lunch and Free Time: How to Keep the Day Comfortable
- Price and Value: Is $109.63 a Good Deal
- When the Route Changes: Staying Flexible Without Losing the Day
- Who This Tour Suits Best
- Should You Book This Kamakura and Enoshima Day Trip?
- FAQ
- What time does the tour start?
- How long is the Kamakura & Enoshima day trip?
- Are there any admission fees during the tour?
- Is lunch included?
- Can the itinerary order or stops change?
- What happens if weather is poor?
Key Highlights You’ll Actually Care About
- Romy, Harry, and Hamate-san show up often for a reason: clear cultural context and practical guidance
- Tsurugaoka Hachimangu + Komachi Street gives you both the sacred and the snack-and-shop side of Kamakura
- Hasedera Temple’s Eleven-headed Kannon plus big scenic views from the upper observation area
- Enoshima Island in the afternoon means lighter crowds than peak morning city hours (timing varies)
- Maximum 40 people keeps the bus day feeling more personal than a giant coach crowd
How This 9.5-Hour Bus Day Works From Tokyo and Yokohama
This is a single-day loop that leaves early from Tokyo or Yokohama and returns you back to the meeting point. The start time is 8:30 am, and the total duration is about 9 hours 30 minutes, so plan on a full day that eats most of your energy.
Pickup is near public transportation, and you’ll use a mobile ticket. If you’re starting from Yokohama, expect the possibility of delays from road conditions and regular Tokyo-area traffic. The general pickup window is between 9:30 and 9:50, and the guide will contact you with an estimate; do show up about 10 minutes early so you don’t get left waiting.
One more real-world note: your itinerary order can shift based on road conditions, operating hours, and weather. That’s not a problem as long as you’re flexible, but if you hate uncertainty, treat this as a guided “best effort” day, not a clockwork script.
Tsurugaoka Hachimangu Shrine: Kamakura’s Sacred Main Street
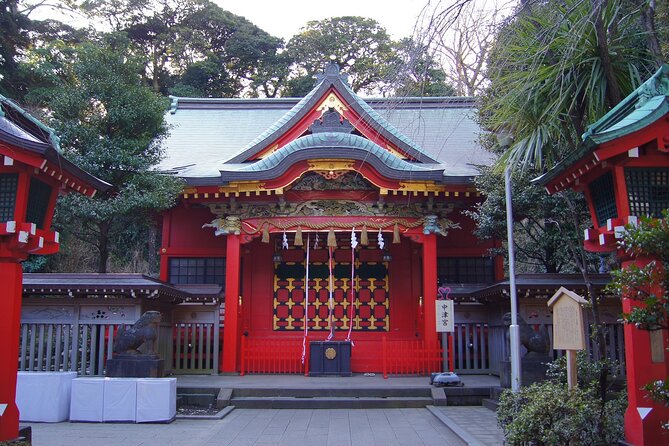
Your first anchor stop is Tsurugaoka Hachimangu Shrine, a major spiritual site in Kamakura. You’ll get about 1 hour 30 minutes here, and admission is free, which helps you spend your time on atmosphere rather than tickets.
What makes this stop valuable is the layout: you’re not just looking at a building, you’re walking through a place that feels like the heart of Kamakura’s religious life. It’s a great way to reset your brain after the bus ride, and it sets the theme for the rest of the day so the temples later won’t feel random.
Practical tip: aim to slow down around the main areas instead of sprinting for photos. Shrines reward that calm pace, and your guide will point out what to notice so you don’t miss the small stuff that makes it feel meaningful.
Komachi Street Shopping Break: Snacks, Souvenirs, and Local Flavor

After the shrine, you’ll head to Komachi Street for about 1 hour. This is the “everyday Kamakura” stretch—local shops and restaurants line the pedestrian area, and it’s a handy place to grab something you actually want.
Admission is free, but your time here isn’t passive. If you’re collecting little gifts for friends, this is where you can do it without spending the whole day hunting. If you’re hungry, the timing also lines up nicely with the tour’s optional lunch plan later.
If you hate crowds, be smart about your rhythm. Go for the quick wins first—photo, snack, one or two shops—then step aside to check out side lanes when the main walkway gets busy. You’ll enjoy it more that way.
Hasedera Temple’s Eleven-headed Kannon and Flower Views
Hasedera Temple is one of the strongest stops on the route, with about 1 hour 15 minutes on the schedule and admission included. This place has a very specific story: around 1300 years ago, two sculptors carved Kannon statues out of a sacred tree, and one was enshrined at Hasedera. The statue is commonly called the Eleven-headed Kannon because it has eleven heads on top of its own head.
Why I think this matters to you: a lot of temple stops in Japan feel similar fast. Hasedera avoids that by giving you a signature “only here” centerpiece plus scenery. Hasedera is on a mountain called Kannon-zan, and the grounds are known for flowers that bloom throughout the year. Even if you’re not chasing flowers, that means the approach and the pathways feel alive.
Then there’s the view. The upper observation platform is recognized as one of the most picturesque spots in Kamakura. If you only have time for one “lookout moment” in Kamakura, this is a top contender—so give yourself a real chance to enjoy it instead of rushing back to meet the group.
Kotoku-in Great Buddha: The Short Stop That Hits Hard
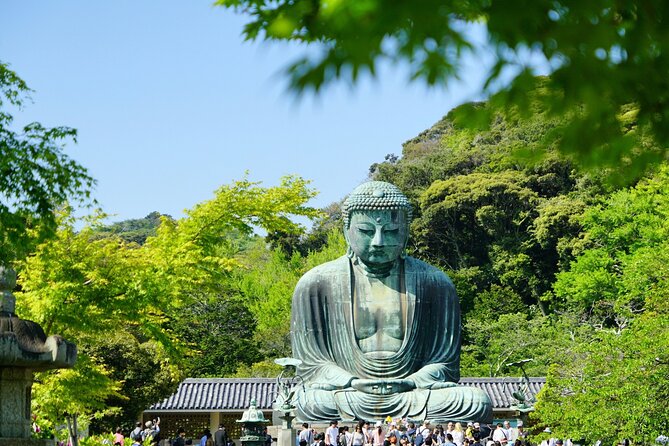
Kotoku-in (the Great Buddha of Kamakura) is a smaller time block—about 30 minutes—and admission is free. In other words, it’s not where you linger for long. But it’s where the day delivers a fast, physical sense of scale.
You get a classic Japan moment: a massive Buddhist figure that makes the whole idea of Kamakura feel tangible. This stop also helps balance your day, because earlier you’ve been walking through streets and shrine grounds. The Great Buddha gives you a different kind of attention—less “wander,” more “stand, look, feel the presence.”
If you’re traveling with kids or you’re short on energy, this is a good “high impact, low time” stop. If you love photos, your guide can often help you pick an angle that works with where the light is at that moment.
Enoshima Island Afternoon: Shrines, Gardens, and Coast Panoramas
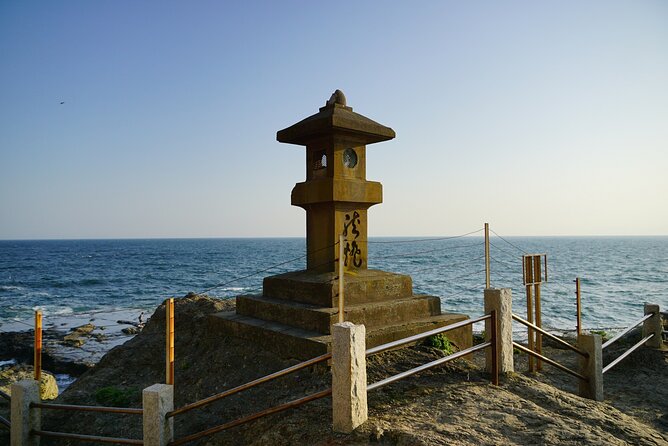
In the afternoon, you shift from temple hills to Enoshima Island, a scenic island known for its views and relaxed atmosphere. You’ll spend about 1 hour 30 minutes here, with admission also free.
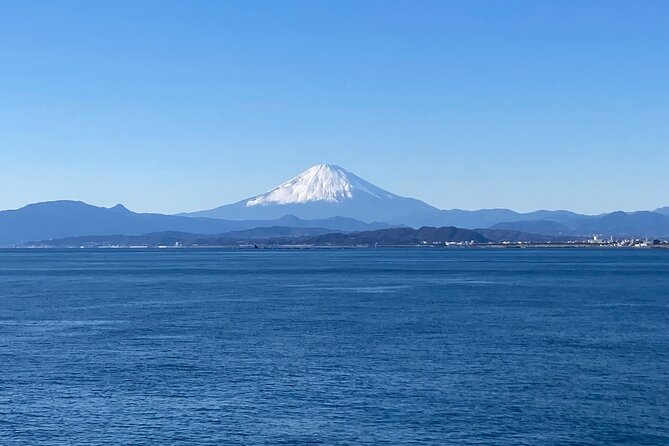
You’ll explore Enoshima Shrine and surrounding gardens, then head to observation decks for panoramic coastal views. One of the big “nice if possible” perks: if the weather cooperates, you might see the silhouette of Mount Fuji. Don’t count on it, but it’s exactly the kind of bonus view that turns a good day into a great one.
What makes Enoshima a smart close to the day is the contrast. Kamakura gives you tradition and stone; Enoshima gives you sea air and space. The bus day often feels more enjoyable when the ending is a little lighter and open-feeling.
Practical advice: wear comfortable shoes. Even though it’s one island stop, observation points and walking paths can add up faster than you expect.
Lunch and Free Time: How to Keep the Day Comfortable
Lunch is optional, and the tour mentions that allergy-friendly meals may be available. Still, your first-choice meal isn’t guaranteed every time, so if food restrictions are a big deal for you, communicate early when you book and be ready with a backup plan.
Because the tour is time-managed, think of meals as part of the schedule, not a separate event you can stretch. If you want to shop on Komachi Street, do it before you commit to an extra-long lunch. If you’re the type who gets stressed when plans run behind, aim to eat quickly and keep moving.
One small planning mindset helps: treat the day like a guided checklist with breathing room. You get enough time at each highlight to enjoy it, but it’s still a bus tour. That means your best strategy is to decide what you want most—shots, shopping, or slow looking—and then let the rest be supporting acts.
Price and Value: Is $109.63 a Good Deal
At $109.63 per person, this tour isn’t a budget “just transport” option. What you’re paying for is the full package of guided visits, organized timing, and the convenience of getting between Tokyo/Yokohama, Kamakura, and Enoshima without juggling trains and transfers.
You also get value through included admission at Hasedera, while the major other stops are free entry. Add in the fact the group size is capped at 40, and the day feels designed for guided pacing rather than mass wandering.
From a value angle, this tour works best if:
- you want a structured day with minimal navigation effort
- you care about context (the best part of shrine and temple visits)
- you’re okay with a long day in exchange for getting two destinations in one hit
If you prefer independent travel and already know how to get to Kamakura and Enoshima, you may be able to build a DIY day for less money. But you would trade off the guidance that helps you understand what you’re seeing and where to focus.
When the Route Changes: Staying Flexible Without Losing the Day
The tour can adjust based on traffic, operation hours, and weather. In some cases, locations may be swapped for substitutes such as Engaku-ji Temple, Kencho-ji Temple, Kamakuragu Treasure Hall, or Ryuko-ji.
That sounds inconvenient, but here’s how to make it work for you: keep your expectations flexible and your priorities clear. Your goal is Kamakura’s temple atmosphere and Enoshima’s coastal views. Even with substitutions, the day remains in that same theme lane.
Also note that the itinerary order may change depending on conditions. This matters because it affects walking comfort and crowd levels. The upside is you’re not stuck with a plan that ignores real-world logistics.
Who This Tour Suits Best
This one fits well if you want:
- a guided day trip from Tokyo or Yokohama
- iconic Kamakura sights plus Enoshima’s seaside payoff
- a plan that helps you do the spiritual and scenic parts in a single day
It’s also a good match for people who like a guide who can adjust when the weather turns. One guide example highlighted adapting the plan for hot conditions, and that kind of on-the-ground realism is exactly what makes a long day feel smoother.
On the other hand, you might want to skip this if you:
- hate long days and prefer slow travel
- expect Mount Fuji every time (weather affects that)
- want complete control over timing minute-by-minute
Should You Book This Kamakura and Enoshima Day Trip?
I’d book it if your dream day in this part of Japan includes a mix of sacred sites and a real coastal finish. Tsurugaoka Hachimangu sets the tone, Hasedera brings a specific, memorable centerpiece with big views, Kotoku-in gives a powerful short stop, and Enoshima closes with the sea and possible Fuji silhouette.
I wouldn’t book it if you’re trying to do a lightweight day or you only want one of the two destinations. This tour is built for doing a lot, with guidance and comfort on a bus.
If you like the idea of following a good guide, keeping your shoes on for walks, and trading independent navigation for a ready-made plan, this is a strong value for your time.
FAQ
What time does the tour start?
The tour starts at 8:30 am.
How long is the Kamakura & Enoshima day trip?
It runs about 9 hours 30 minutes, and it ends back at the meeting point.
Are there any admission fees during the tour?
Tsurugaoka Hachimangu Shrine, Komachi Street, Kotoku-in, and Enoshima Island stops are listed as free. Hasedera Temple includes admission.
Is lunch included?
Lunch is optional, and allergy-friendly meals may be available (your first choice isn’t always guaranteed).
Can the itinerary order or stops change?
Yes. The order may change due to traffic, operating hours, and weather. If a location can’t be visited, substitutes may include Engaku-ji, Kencho-ji, Kamakuragu Treasure Hall, or Ryuko-ji.
What happens if weather is poor?
The experience requires good weather. If it’s canceled due to poor weather, you’ll be offered a different date or a full refund.