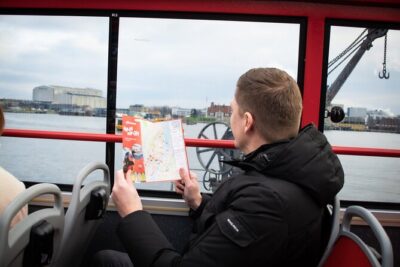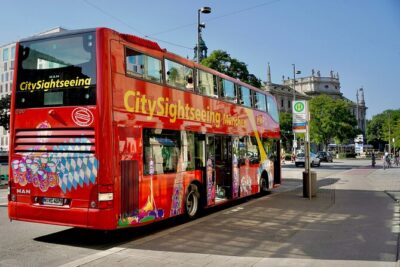
One ticket, two big moods: city sights first, then mountain views. What makes this combo work is the 48-hour unlimited hop-on hop-off loop paired with an all-day pass up to kunanyi/Mt Wellington, so you can pace Hobart instead of rushing it. I especially liked the ride structure—short hop-and-go segments—plus the built-in narration that helps you understand what you’re seeing without pulling out a book. The main drawback to plan around is timing: the mountain-side bus can be picky at the end of the day, and a missed last service can turn into an expensive detour.
My second big win was the extras that reduce friction. You get an official sightseeing guide to Hobart, plus a bushwalking map for Wellington Park, and the buses are air-conditioned with WiFi on board. That’s a lot of comfort for the price, but you’ll still want to dress for wind and sudden weather changes once you’re up near the lookout areas.
In This Review
- Key points to know before you ride
- 48 hours in Hobart: how the hop-on hop-off loop actually helps
- Where you start and finish matters
- kunanyi/Mt Wellington Explorer Pass: the mountain part of the day
- Mountain drop-offs: pick your walk level
- A practical warning: wind and visibility change the experience
- Comfort note for motion sickness
- Food situation
- The city loop: what you’ll see at each major stop
- Waterfront start: Brooke Street Pier
- Hydro Tasmania building
- Princes Wharf area: 30 Morrison St
- Science and engineering stop: 3 Castray Esplanade
- Suburban-to-city connection: Hampden Rd corner stop
- Easy city rhythm: De Witt St, St Georges Terrace, and Sandy Bay Road corners
- Wrest Point
- Cascade Brewery Bar
- Macquarie St and Collins St: classic CBD shots
- Maritime Museum Tasmania and the waterfront story
- Botanical Gardens: a must-stop if you want calm
- Final CBD rhythm: Rose Gardens, then back toward Collins/inner city
- A photo reality check
- Commentary and guides: what’s useful, what’s optional
- Comfort, WiFi, and the weather factor you can’t ignore
- How to get value out of $60.97 (without over-scheduling)
- A smart way to pace it
- Timing caution: the last bus issue
- Who should book this Hop-On Hop-Off + Mt Wellington combo?
- Should you book? My practical take
- FAQ
- How long is the city loop ride?
- Does the Mt Wellington portion include commentary?
- What’s included with the ticket besides bus access?
- Are attraction entrance fees included?
- Where does the city loop start and finish?
- Where are some of the kunanyi/Mt Wellington stops?
Key points to know before you ride
- 48 hours of unlimited use on the city loop, so you can repeat stops or rearrange plans
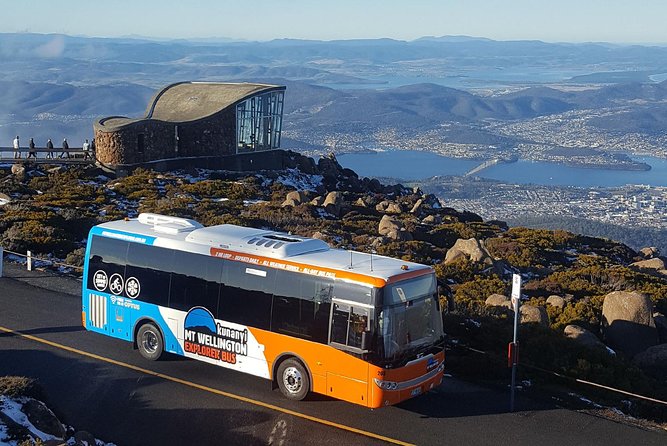
- All-day kunanyi/Mt Wellington Explorer Pass with English commentary for the drive up and around Wellington Park
- Real-world stop design that mixes CBD landmarks with mountain drop-offs (Fern Tree Park, The Chalet, Big Bend, The Pinnacle)
- Greg-style driver commentary is a highlight when you catch him—warm, well paced, and full of local context
- WiFi and guide extras mean you’re not stuck guessing where to go after you hop off
- Weather affects photo time and timing; have a plan for wind and poor visibility at the top
48 hours in Hobart: how the hop-on hop-off loop actually helps
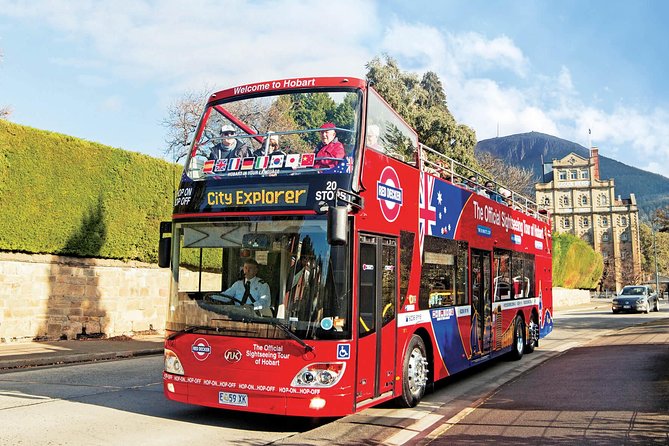
The heart of this ticket is simple: you can ride the red-decker-style city loop, hop off when you want, and catch the next bus when you’re ready. That “next bus” flexibility matters in Hobart because the best photo moments and the easiest walking routes often depend on weather. If it’s drizzly or windy, you can still move around without committing to long stretches on foot.
You also get a loop that’s designed for orientation. In one continuous run, you pass major landmarks and frequent pickup areas, which makes it easier to decide what’s worth a longer stop. I like that you’re not paying for one fixed sightseeing window; you’re buying time and options.
And since you have 48 hours, you can do the loop more than once. If you start on day one, you can use the ride to map your day around your own interests—then return for second helpings: gardens, maritime sights, or just lingering near the water.
Where you start and finish matters
The city loop starts and finishes at the Tasmanian Travel & Information Centre. That makes planning easier because you always know where the “home base” is when you’re deciding whether to continue, detour, or call it a day.
kunanyi/Mt Wellington Explorer Pass: the mountain part of the day
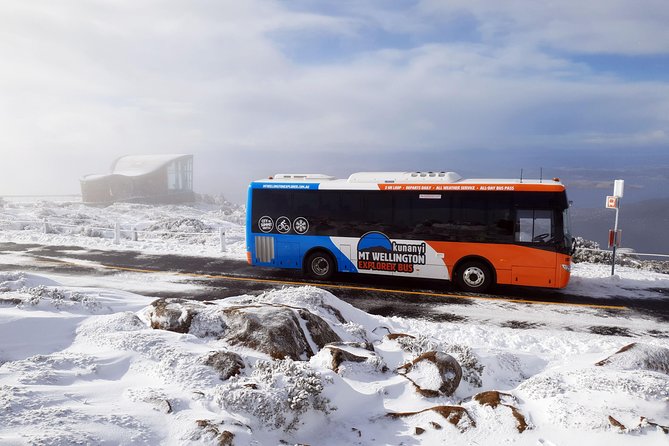
This is the reason many people book. Hobart’s dramatic advantage is that the city and the mountain are close, and kunanyi/Mt Wellington is where you feel that instantly. On a clear day, the views can be truly impressive; on a cloudy or rainy day, you still get the ride and the chance to walk if conditions allow.
The Explorer Pass comes with English commentary, and the experience up top is heavily shaped by the driver’s approach. One of the strongest impressions from recent riders was of a driver named Greg—people highlighted how he stayed organized, kept them informed, and even managed comfort when it was very cold up near the lookout areas. If you’re lucky enough to get him, you’ll likely enjoy a smoother rhythm on the climb.
Mountain drop-offs: pick your walk level
Your mountain route includes several key points where you can get on and off. Based on the stops, the most useful thing is understanding the “ladder” of access—from nearby viewpoints to higher places:
- Fern Tree Park bus stop (a common starting point for mountain time)
- The Springs bus stop, connected to the North-South Track area
- Wellington Park at The Chalet bus stop (useful for bushwalking access)
- Big Bend on Pinnacle Road (a viewpoint-ish area)
- The Pinnacle on Pinnacle Road (often the top-of-the-top feel)
I like this setup because it gives you options without requiring you to commit to one huge hike. If you only want a short walk, you can use a lower stop. If you want to stretch your legs, you can aim for the highest drop-off and build your return around bus timing.
A practical warning: wind and visibility change the experience
Up on kunanyi/Mt Wellington, wind is not a minor detail. It can turn a “quick photo stop” into a “bundle up and move” situation. I’d plan for the top to feel colder than the city—especially if you’re aiming for Pinnacle Road points.
Also, if you’re planning to hop off for a trail, it’s smart to check for any trail closures before you commit to walking. People have flagged that it would be helpful to get a heads-up about closures before they get off.
Comfort note for motion sickness
The mountain drive is on narrow roads with lots of winding. If you’re sensitive, put yourself near the front of the bus when possible. It’s an easy tweak that can reduce the feeling of motion.
Food situation
You’ll likely want a snack plan. There’s mention that a cafe at the summit would be handy, but that’s not something you should assume is available. If you care about having an easy warm drink, bring it (or at least plan a stop in town before you head up).
The city loop: what you’ll see at each major stop
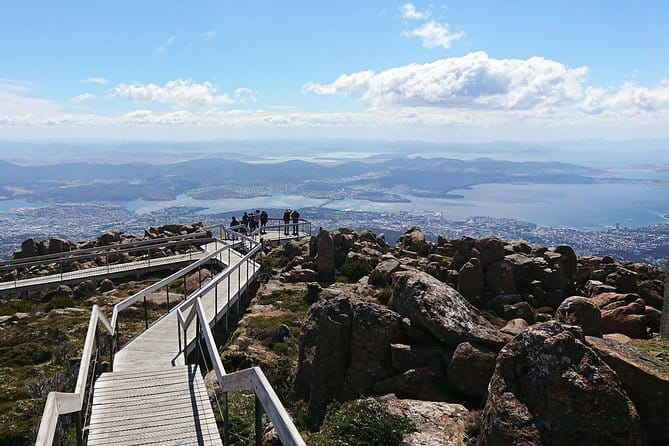
The city loop is built around a sequence of stops that work for both first-timers and repeat visitors. You can treat it like a guided sampler, then come back on a second loop if something grabs you.
Below is the practical way I’d think about the stops—not as a list, but as choices that match what you might want to do.
Waterfront start: Brooke Street Pier
If you like water views and easy access to the harbor area, Brooke Street Pier is a helpful anchor. It’s also a convenient place to orient yourself before you begin hopping.
Hydro Tasmania building
This stop is on your route outside the Hydro Tasmania building. Even if you don’t go in, it gives you a quick sense of the power-and-industry side of Tasmania—useful context if you’re trying to understand why the island looks the way it does.
Princes Wharf area: 30 Morrison St
Outside the main entrance of Princes Wharf No.1, this is where the maritime theme becomes more real. If you like boats, waterfront activity, or just the vibe of working docks, it’s worth stepping off for a short walk—then re-boarding when you’re ready.
Science and engineering stop: 3 Castray Esplanade
Outside CSIRO, this stop is a useful “mid-loop” reference point. If you want something calmer and less tour-bus-y than the central waterfront, this area can feel like a breather.
Suburban-to-city connection: Hampden Rd corner stop
At the corner of Hampden Rd and Colville St (34 Hampden Rd), you get a sense of how Hobart spreads beyond the core. This can help you understand where neighborhoods sit if you plan to explore on your own later.
Easy city rhythm: De Witt St, St Georges Terrace, and Sandy Bay Road corners
Stops near De Witt St (near Cromwell St intersection), St Georges Terrace (near Sandy Bay Rd), and Sandy Bay Road corners (143 Sandy Bay Rd at Sandy Bay Rd and Queen St) help you stitch together Hobart’s layout. This is less about a single “must-see” and more about creating a mental map fast—exactly what a loop is for.
Wrest Point
Wrest Point is included as a stop outside the main entrance. If you’re interested in casinos, entertainment venues, or just want a recognizable landmark, it’s an easy “I know where I am now” moment.
Cascade Brewery Bar
Cascade Brewery Bar is on the loop at Cascade Road. If you’re a beer fan, this is one of the most useful hop-off points because you can plan around tasting and then return to the loop.
Macquarie St and Collins St: classic CBD shots
Stops at 409 Macquarie St (corner of Macquarie St and Weld St) and 119 Collins St (near Murray St intersection) cover a lot of central shopping and walking options. If you want flexible time in the middle of the city, these are practical stops.
Maritime Museum Tasmania and the waterfront story
Maritime Museum Tasmania is on the loop. For me, this is the kind of stop that makes the whole trip feel more grounded: Hobart didn’t grow on beaches alone; it grew through shipping and sea trade. Even if you only spend an hour, it’s worth it if you like the idea of understanding the city’s maritime relationship.
Botanical Gardens: a must-stop if you want calm
The Royal Tasmanian Botanical Gardens is outside the main entrance. This is a top choice when you want a break from buses and crowds. People also found the botanical stop enjoyable, and it’s a great place to slow down for photos and a short walk.
Final CBD rhythm: Rose Gardens, then back toward Collins/inner city
You also pass the University Rose Gardens area and then return through city-adjacent stops like Zero Davey Boutique Apartments (Davey St and Hunter St) and other inner-city points. This is where the loop feels like a full circle: you get gardens, water-adjacent streets, and major landmarks without buying a single “attraction ticket.”
A photo reality check
Some riders noted that weather constraints can make it harder to get decent photos, especially if your best picture angle requires getting on and off. My tip: if weather is messy, treat your hop-offs like quick errands. Get off, capture what you can, then move. For longer photo sessions, you’ll need the bus timing on your side, and wind can steal minutes.
Commentary and guides: what’s useful, what’s optional

The narration is one of the strongest built-in values here. You get on-board commentary in your language, and the mountain Explorer Pass also includes English commentary. That combo makes the ride feel like more than transport—you’re learning as you go.
Even when commentary is recorded, it helps you recognize patterns: why certain waterfront areas sit where they do, what the city’s major institutions represent, and what to expect once you’re higher up near Wellington Park.
The complimentary official guide and the Wellington Park bushwalking map are also a practical bonus. The guide helps you connect stop names to real places. The bushwalking map helps you choose a walking route without guessing.
If you like to travel light, these extras are valuable. You’re not stuck buying a second pamphlet later.
Comfort, WiFi, and the weather factor you can’t ignore

This is an air-conditioned bus, which matters in Hobart when the day swings between cool and warm. WiFi on board also helps you plan on the fly: checking where you are, mapping a short walk, or looking up closure alerts before you commit to a trail.
That said, the mountain is still the mountain. Even on a good day, it can be windy and cold. People highlighted that it was zero degrees at the top in one case, and the driver kept things comfortable—so there’s some effort on the operator side. Still, your clothing choices do the heavy lifting.
If you’re planning photos, bring layers you can manage quickly. Wind makes it hard to hold your posture and steady a camera for long.
How to get value out of $60.97 (without over-scheduling)

At $60.97 per person, the price feels fair only if you use the flexibility. Think of it as two separate advantages:
1) You buy time to move around Hobart for 48 hours.
2) You buy access to kunanyi/Mt Wellington with an all-day pass.
If you only ride once and never hop off, it’s easy to feel like you overpaid. If you use it like a tool to shape your day—orientation first, then targeted stops—the value comes through.
A smart way to pace it
A good plan is:
- Start with the city loop early to pick 2–4 stop priorities.
- Save the most time-sensitive stop types for when the weather looks best (gardens and waterfront can be more rewarding when visibility is strong).
- Put the mountain visit on a day you can flex. If the weather is great, go higher and walk more. If it’s rough, aim for shorter stops and still enjoy the ride.
Timing caution: the last bus issue
One of the most common frustrations in the feedback is missing the final service and being left to sort out a return another way. That’s not fun, and it can erase the value quickly. Before you hop off on the mountain-side, check the last bus window for your route points—and leave buffer time.
Who should book this Hop-On Hop-Off + Mt Wellington combo?
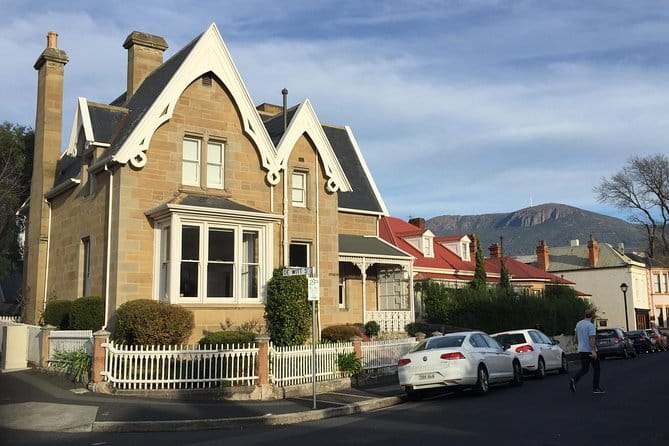
This is a strong fit if you:
- want a fast way to orient yourself in Hobart without renting a car
- like independent pacing (you set the pace, not a fixed tour schedule)
- plan to do at least one short walk up near Wellington Park
- want commentary while you travel, especially on the mountain leg
It’s also a good choice if you’re traveling with mixed interests—someone can enjoy gardens, someone else can focus on maritime themes, while the mountain day becomes the shared highlight.
If you hate being constrained by bus timing, you might feel it on the mountain. Build your day around the bus schedule and allow cushion time.
Should you book? My practical take
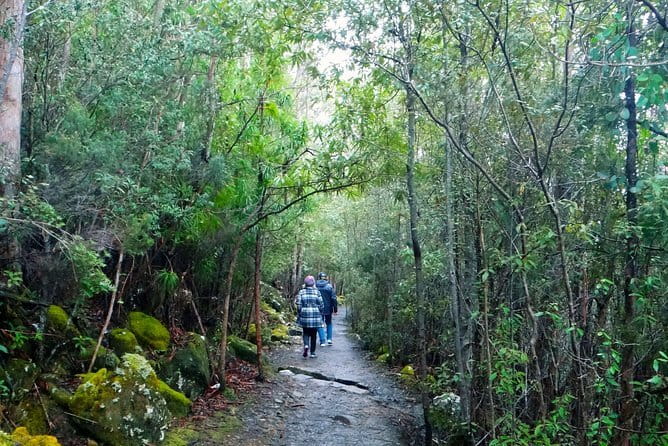
If you’re visiting Hobart for a short window and you want maximum “see it without driving” payoff, I’d book this. The combination of 48-hour unlimited city access plus an all-day kunanyi/Mt Wellington pass is the key. The included guide, bushwalking map, WiFi, and air-conditioning are small things that add up when you’re moving through multiple areas in one day.
Just go in with two expectations: weather can change fast up on kunanyi/Mt Wellington, and you’ll want to respect the end-of-day bus timing so you don’t end up solving transport late. Do that, and you’ll come away feeling like you actually got Hobart’s best angles—city charm and mountain drama—without stress.
FAQ
How long is the city loop ride?
The city loop route is about 90 minutes, and you can use it on a 48-hour unlimited ticket.
Does the Mt Wellington portion include commentary?
Yes. The kunanyi/Mt Wellington Explorer Pass includes English commentary.
What’s included with the ticket besides bus access?
You get an official sightseeing guide for Hobart, a Wellington Park bushwalking map, air-conditioned transport, and WiFi on board.
Are attraction entrance fees included?
No. Entrance fees are not included.
Where does the city loop start and finish?
The city loop starts and finishes at the Tasmanian Travel & Information Centre.
Where are some of the kunanyi/Mt Wellington stops?
The Explorer Pass includes stop points such as Fern Tree Park, The Springs (North-South Track), The Chalet (Wellington Park), Big Bend (Pinnacle Road), and The Pinnacle (Pinnacle Road).